
Scraper Tab is where you can see your scrapers live and manage it.
From here, you can also download the raw data files for specific extractors.

Elements of Scraper Tab
1. Create New Extractor: It opens the ‘Create New Scraper’ Pop up where you can enter a URL to begin creating a new scraper to extract data from it.
2. Search of an extractor: You can search your scrapers by its name.
3. Scraper List: It shows a list of all of the scrapers in your User Account. This list can be searched through with the selected scraper being highlighted.
4. Scraper Name: It shows the scraper name. Keep the cursor on the text to rename your extractor.
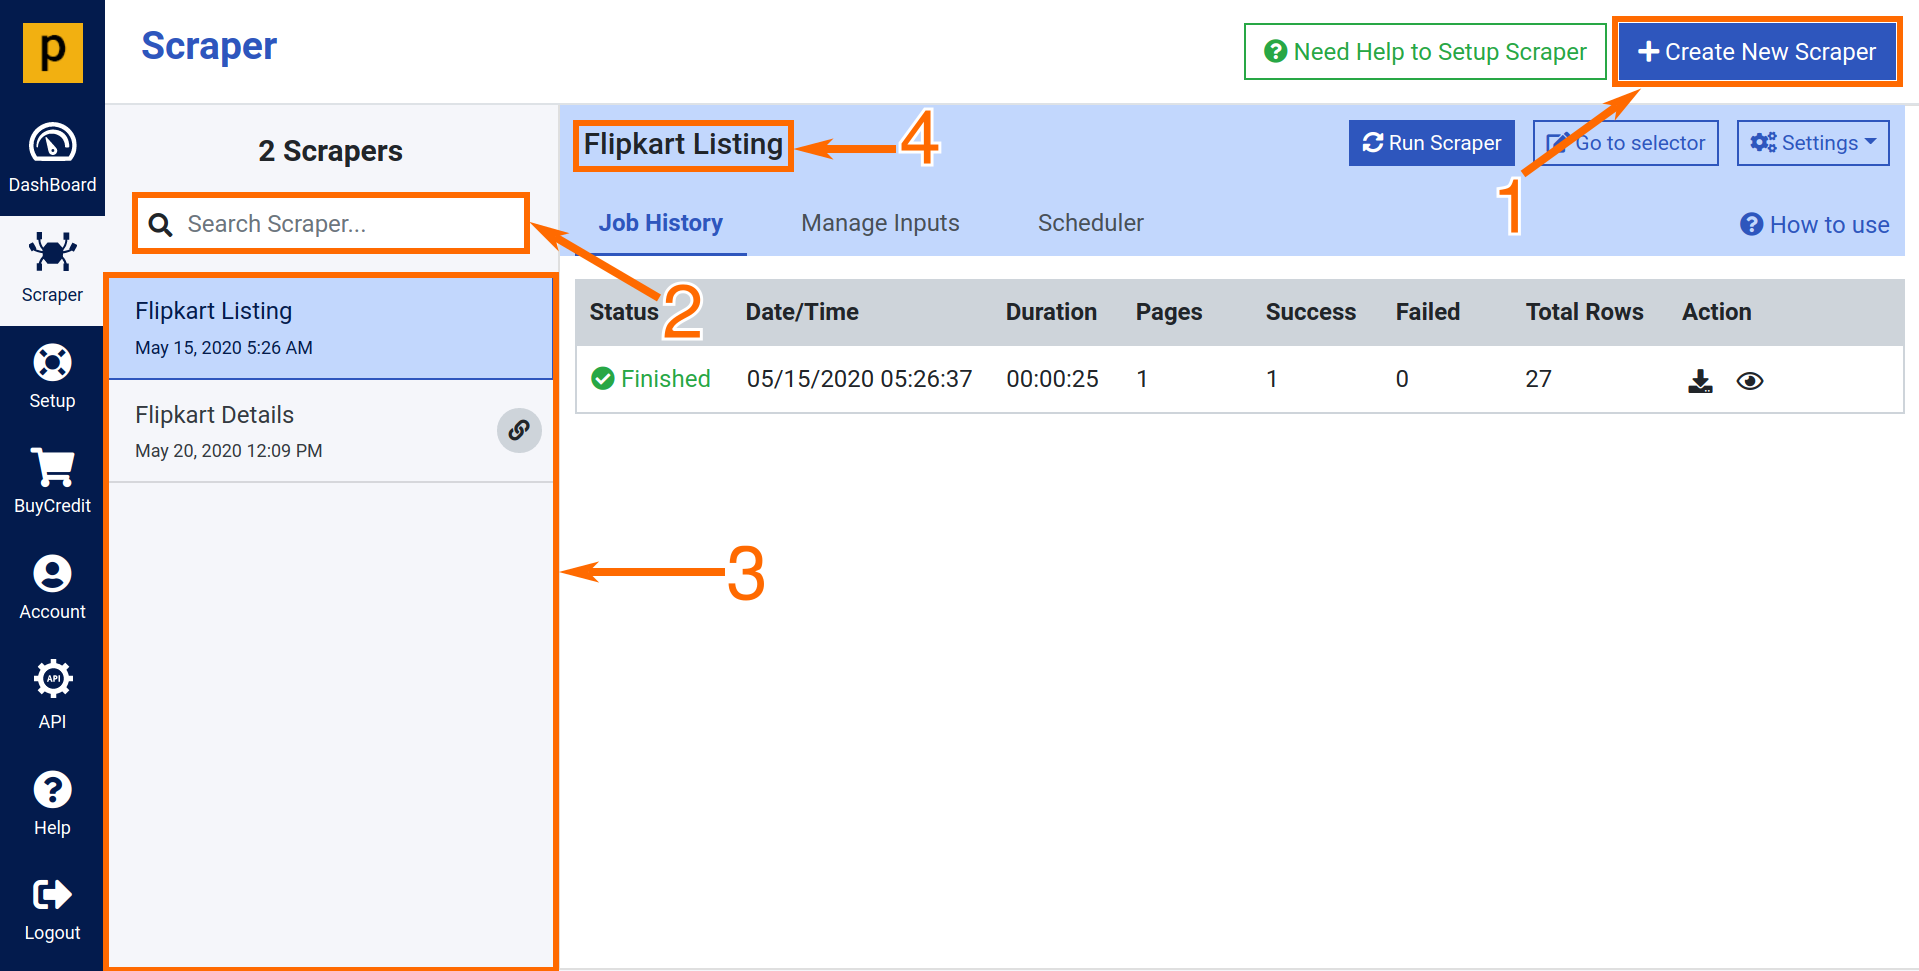
5. Job history: It shows your job history where you can download your data files of each run.

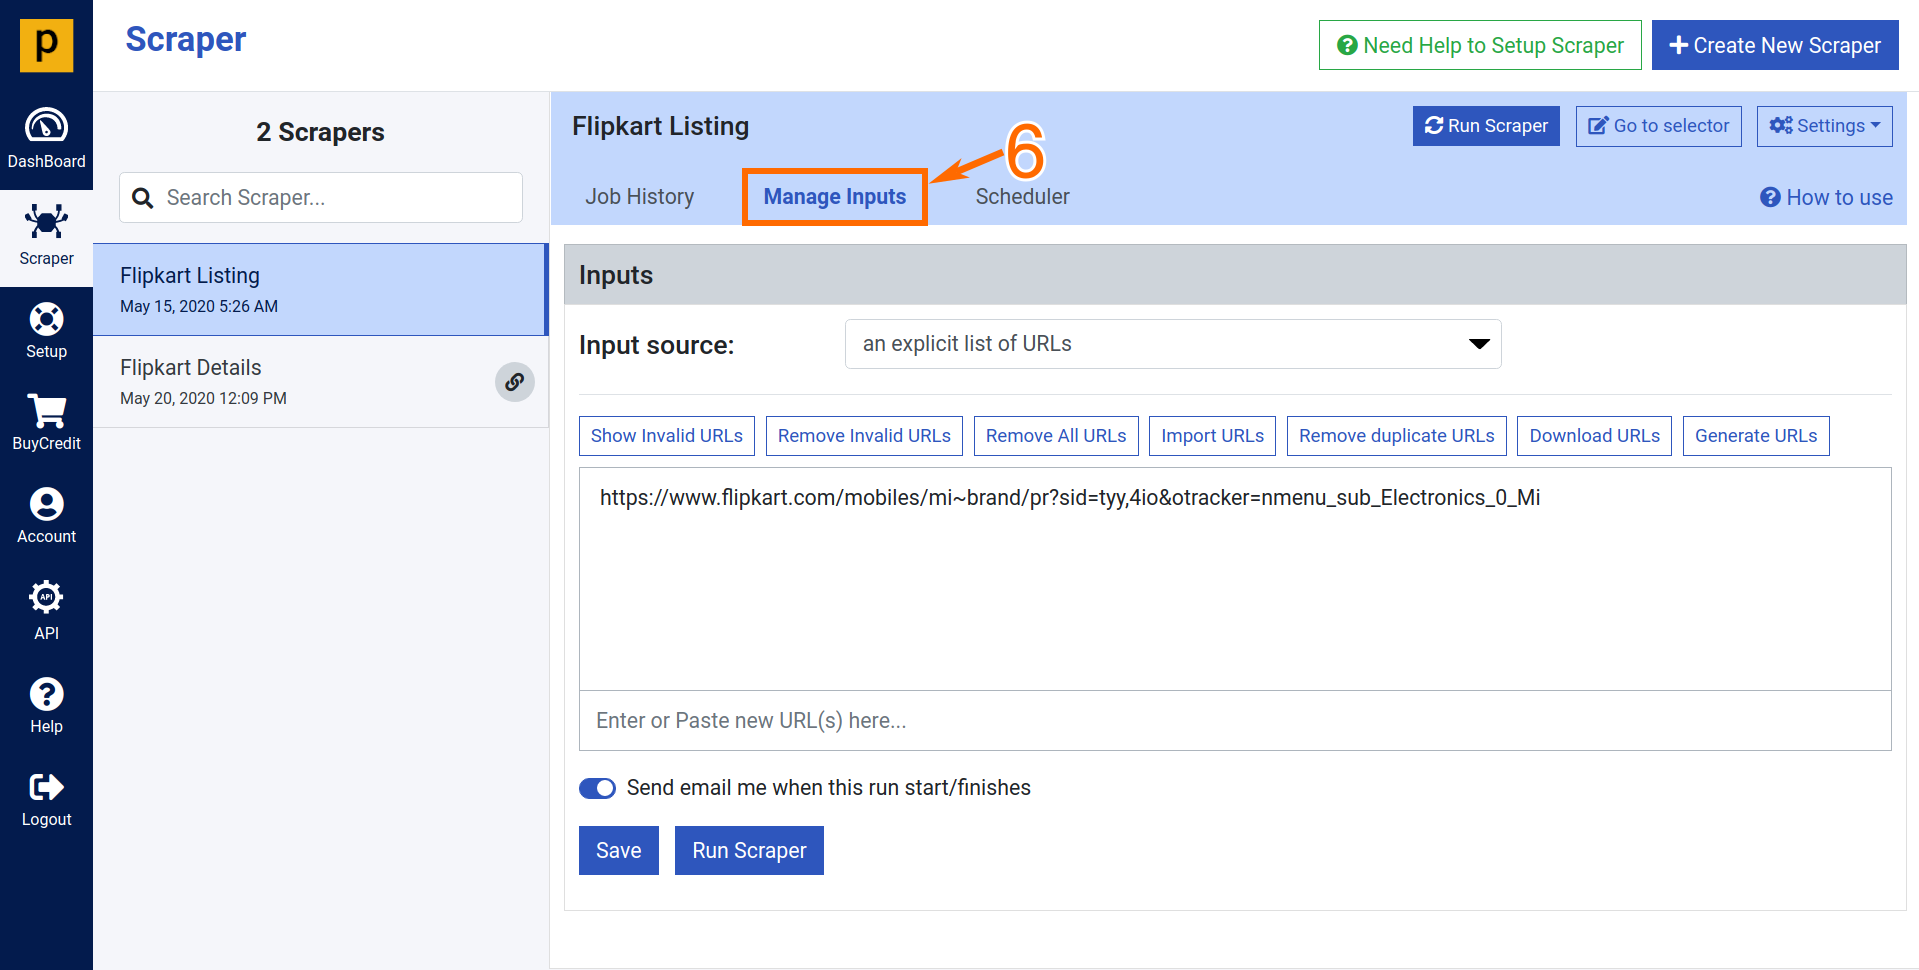
6. Manage Inputs: It allows you to manage your scraper input source where you can import bulk URLs, chain two scrapers, remove duplicate and duplicate URLs.
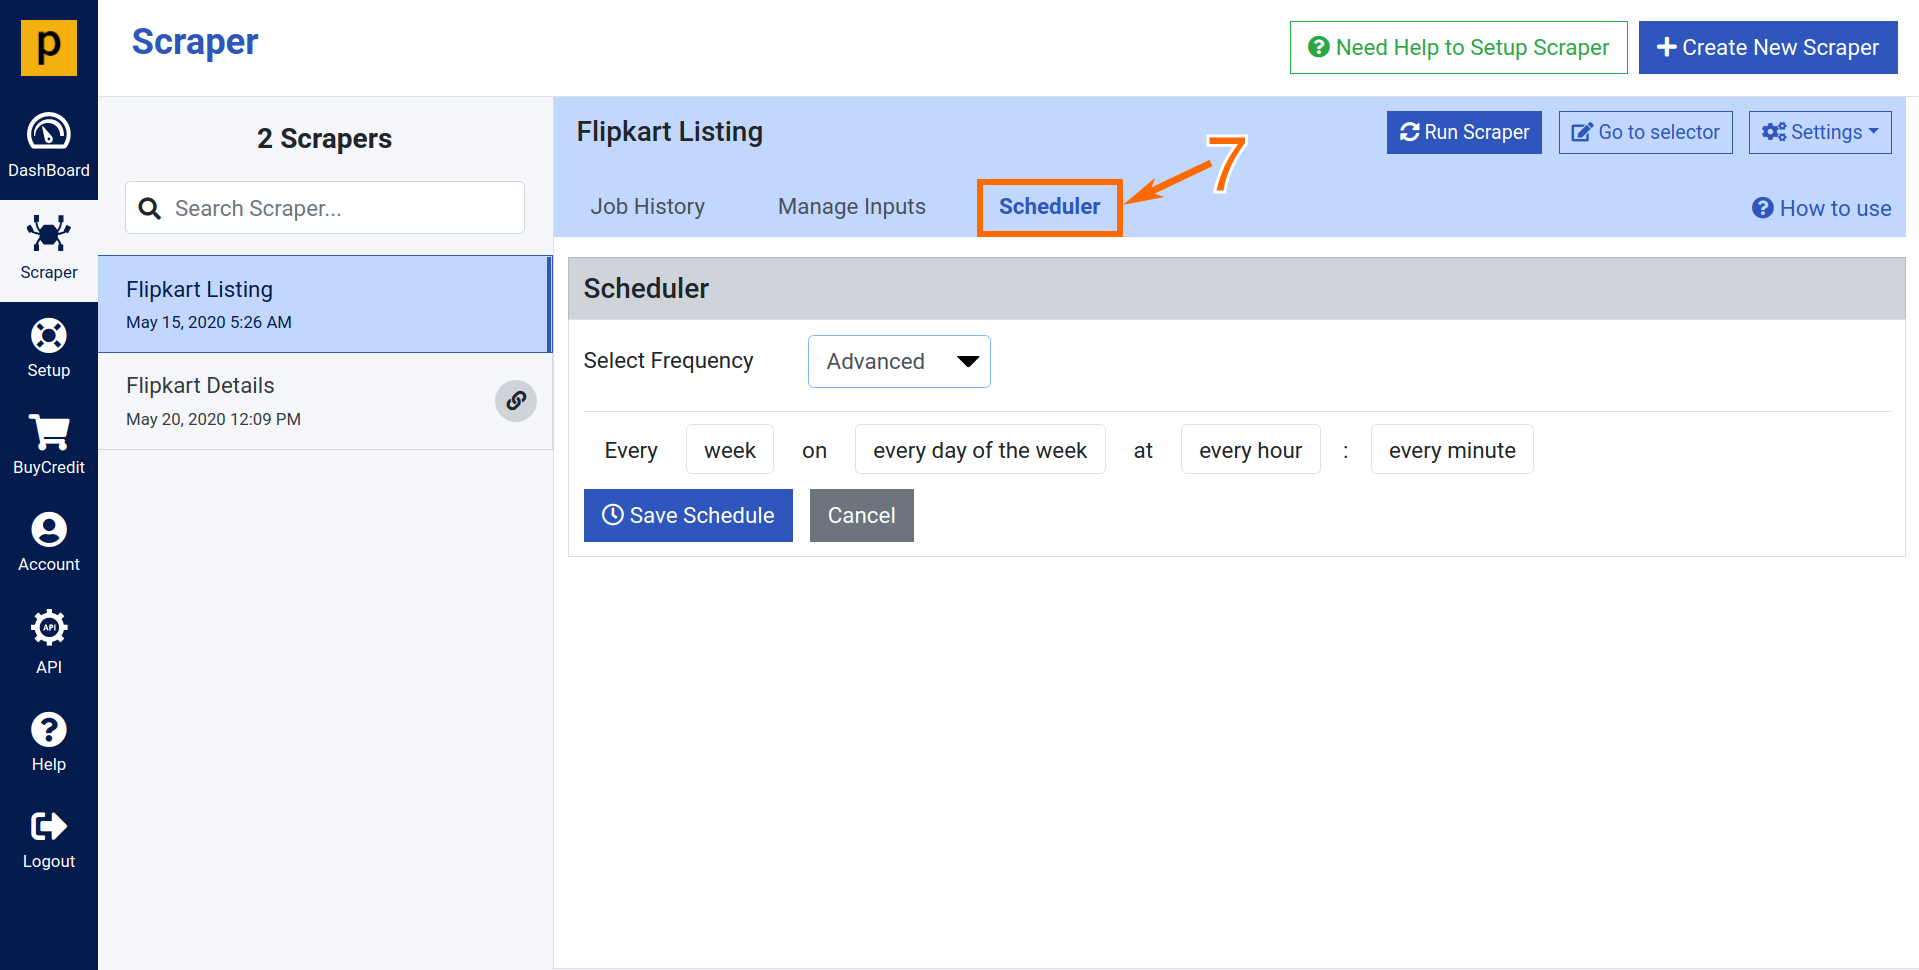
7. Scheduler: Set up scheduled runs hourly, daily, weekly, monthly or custom, according to your business needs.
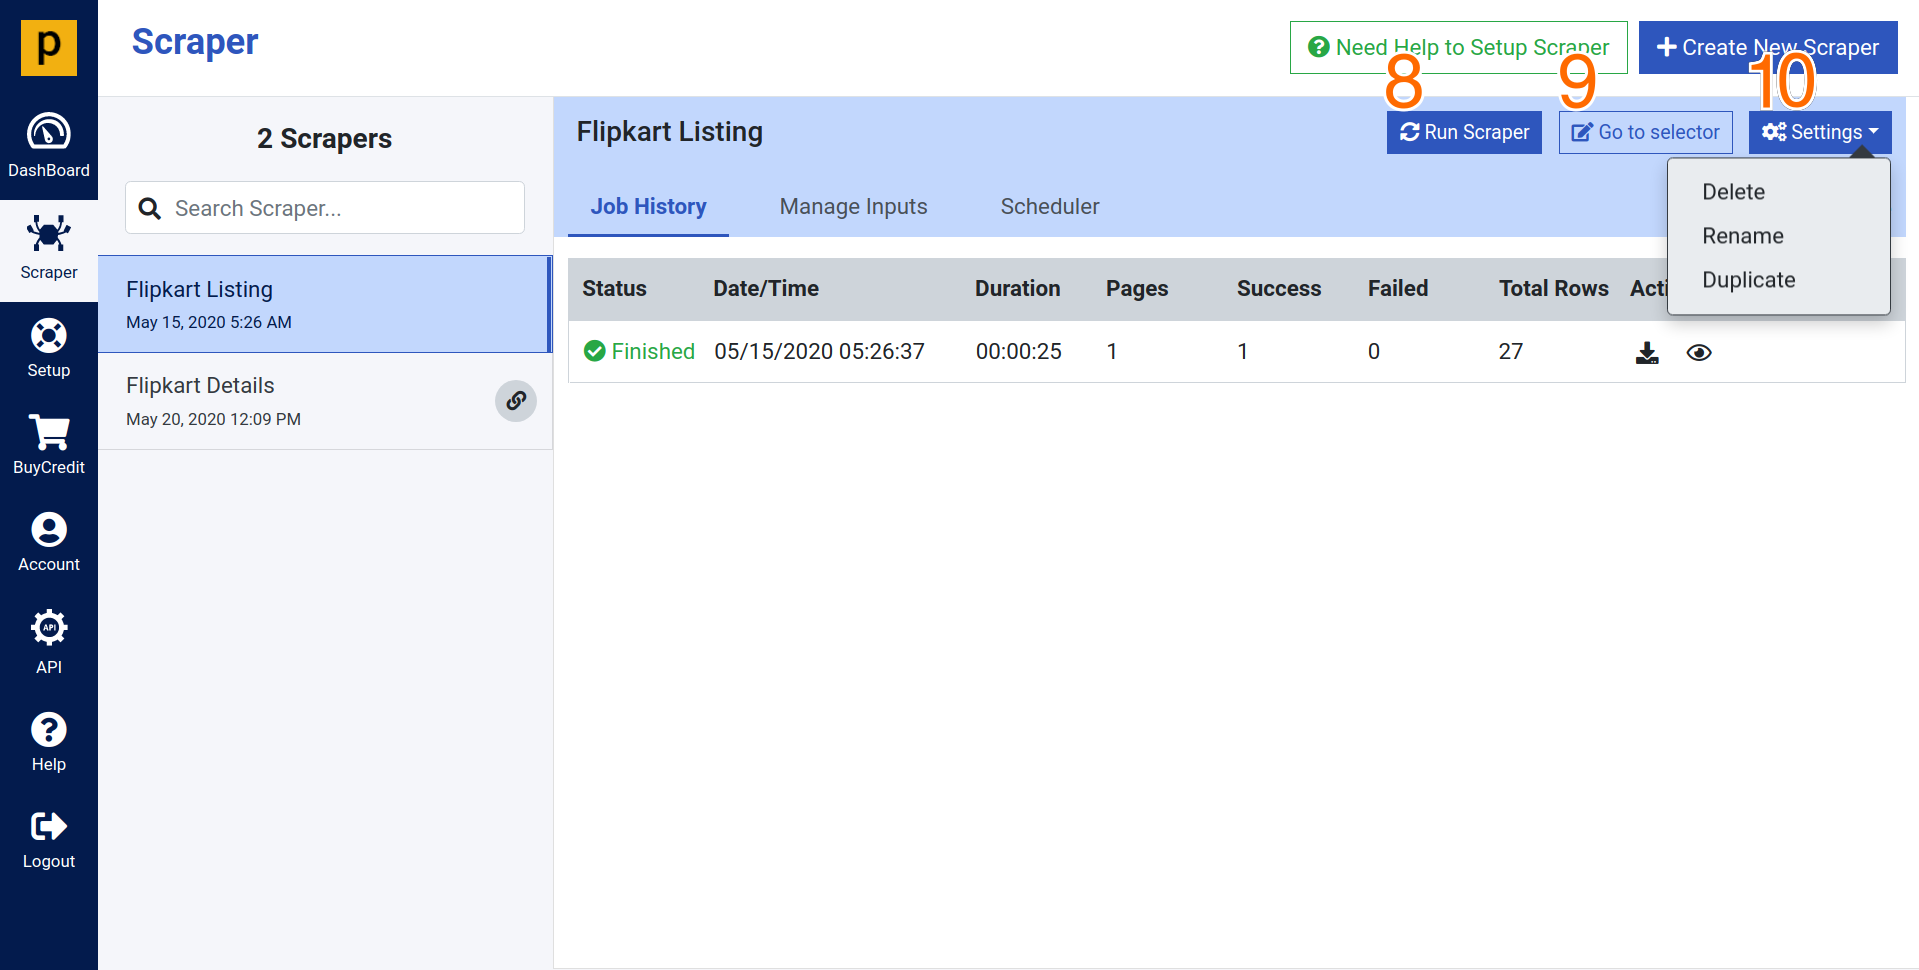
8. Run URLs: You can run your scraper with the configured URLs.
9. Go to selection: It takes you to the editor view to your scraper where you can configure website to scrape data from it.
10. Settings :
- Delete: Permanently delete the selected scraper.
- Rename: rename your extractor name.
- Duplicate: Create a duplicate of the selected scraper.
11. Download Data: It downloads your data in Excel, CSV, and JSON formats. You can also download images and documents in zip format.
12. Data Preview: You can see a preview of your scraped data.

Comments
0 comments
Please sign in to leave a comment.